#FloatingActionButtonPlus
***
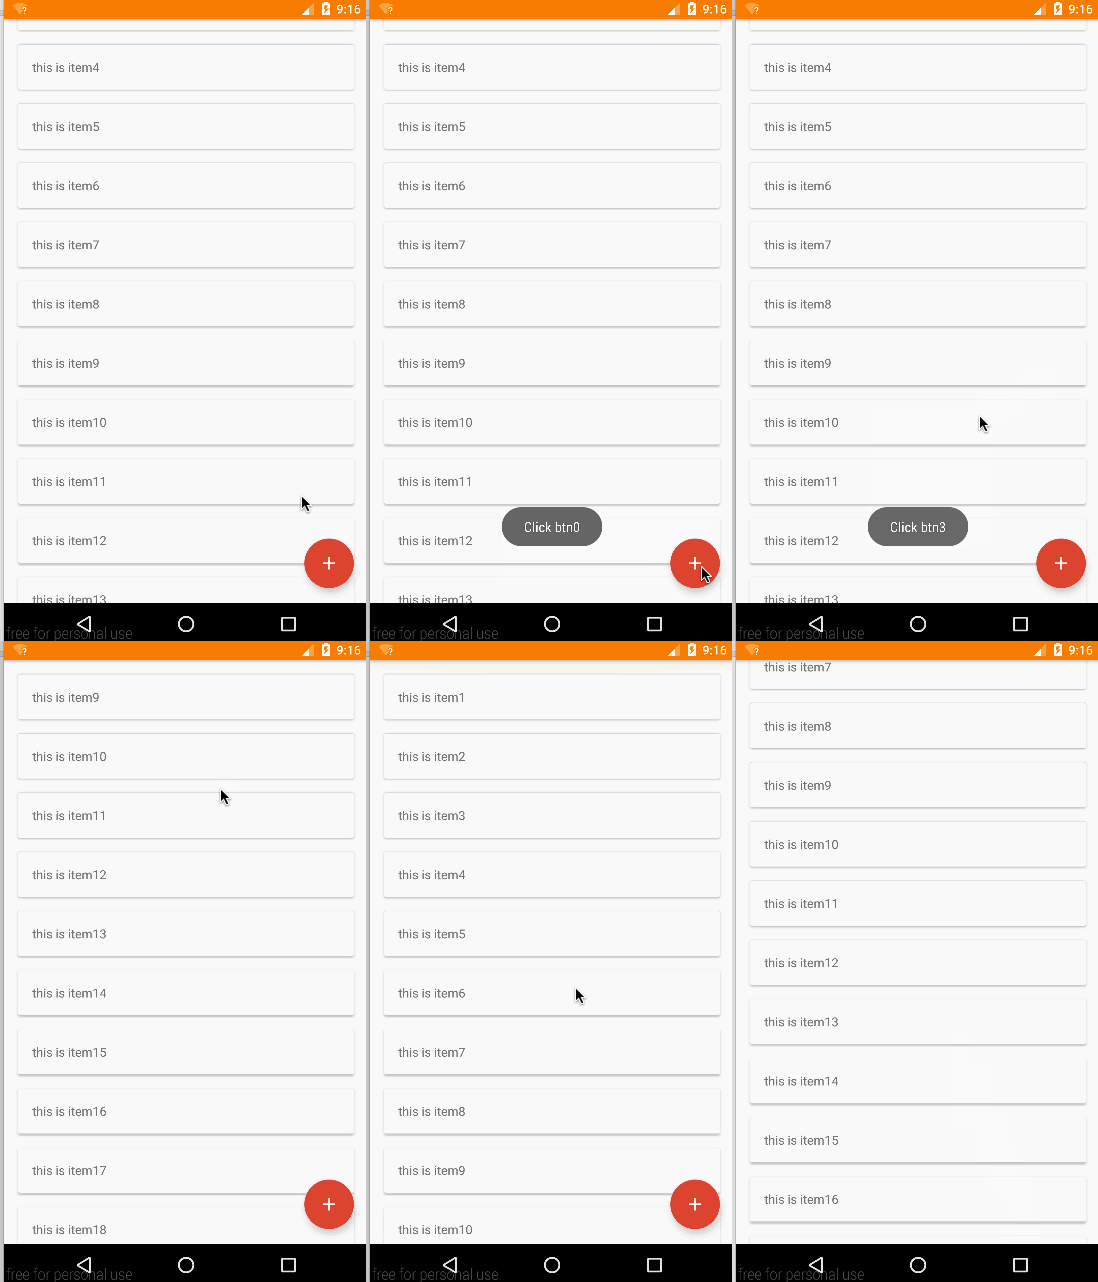
this is a Google Inbox style FloatingActionButton and **My English is poor**。这是一个Google inbox风格的FloatingActionButton控件。
##matters needing attention
该控件理论上最低支持到API版本14也就是Android4.0**(minSdkVersion 14)**,并且由于是官方Support Library中FloatingActionButton的二次封装,showdown的生成在API21以上和21以下并不太一样,所以在不同版本的系统中的效果会存在一定的差异。
######该控件依赖了以下两个support library,使用者无需在项目里再次添加 (Don't need to add)。
com.android.support:design:23.+
com.android.support:cardview-v7:23.+
##How to use
***
###Gradle
compile 'com.lzp.floatingactionbutton:floatingactionbuttonplus:1.0.0'
###Maven
<dependency>
<groupId>com.lzp.floatingactionbutton</groupId>
<artifactId>floatingactionbuttonplus</artifactId>
<version>1.0.0</version>
</dependency>
###The effect of the above(如上图的效果)
####btns.xml
<com.lzp.floatingactionbuttonplus.FloatingActionButtonPlus
android:id="@+id/FabPlus"
android:layout_width="wrap_content"
android:layout_height="wrap_content"
app:switchFabColor="#DB4537"
app:switchFabIcon="@mipmap/ic_add_white_48dp"
app:layout_behavior="com.lzp.floatingactionbuttonplus.FabBehavior"
xmlns:android="http://schemas.android.com/apk/res/android"
xmlns:app="http://schemas.android.com/apk/res-auto">
<com.lzp.floatingactionbuttonplus.FabTagLayout
android:layout_width="wrap_content"
android:layout_height="wrap_content"
app:tagText="Download"
>
<android.support.design.widget.FloatingActionButton
android:layout_width="wrap_content"
android:layout_height="wrap_content"
android:src="@mipmap/ic_get_app_white_48dp"
app:backgroundTint="#468cb7"
app:fabSize="mini" />
</com.lzp.floatingactionbuttonplus.FabTagLayout>
<com.lzp.floatingactionbuttonplus.FabTagLayout
android:layout_width="wrap_content"
android:layout_height="wrap_content"
app:tagText="Favorites"
>
<android.support.design.widget.FloatingActionButton
android:layout_width="wrap_content"
android:layout_height="wrap_content"
android:src="@mipmap/ic_stars_white_48dp"
app:backgroundTint="#818aa7"
app:fabSize="mini" />
</com.lzp.floatingactionbuttonplus.FabTagLayout>
<com.lzp.floatingactionbuttonplus.FabTagLayout
android:layout_width="wrap_content"
android:layout_height="wrap_content"
app:tagText="Send mail"
>
<android.support.design.widget.FloatingActionButton
android:layout_width="wrap_content"
android:layout_height="wrap_content"
android:src="@mipmap/ic_send_white_48dp"
app:backgroundTint="#4BB7A7"
app:fabSize="mini" />
</com.lzp.floatingactionbuttonplus.FabTagLayout>
<com.lzp.floatingactionbuttonplus.FabTagLayout
android:layout_width="wrap_content"
android:layout_height="wrap_content"
app:tagText="shopping list"
>
<android.support.design.widget.FloatingActionButton
android:layout_width="wrap_content"
android:layout_height="wrap_content"
android:src="@mipmap/ic_shopping_cart_white_48dp"
app:backgroundTint="#ff9800"
app:fabSize="mini" />
</com.lzp.floatingactionbuttonplus.FabTagLayout>
<com.lzp.floatingactionbuttonplus.FabTagLayout
android:layout_width="wrap_content"
android:layout_height="wrap_content"
app:tagText="Search this page"
>
<android.support.design.widget.FloatingActionButton
android:layout_width="wrap_content"
android:layout_height="wrap_content"
android:src="@mipmap/ic_search_white_48dp"
app:backgroundTint="#4284E4"
app:fabSize="mini" />
</com.lzp.floatingactionbuttonplus.FabTagLayout>
</com.lzp.floatingactionbuttonplus.FloatingActionButtonPlus>
####activity_main.xml
<?xml version="1.0" encoding="utf-8"?>
<android.support.design.widget.CoordinatorLayout xmlns:android="http://schemas.android.com/apk/res/android"
xmlns:app="http://schemas.android.com/apk/res-auto"
android:layout_width="match_parent"
android:layout_height="match_parent"
>
<android.support.design.widget.AppBarLayout
android:layout_width="match_parent"
android:layout_height="wrap_content"
android:theme="@style/AppTheme.AppBarOverlay">
<android.support.v7.widget.Toolbar
android:id="@+id/toolbar"
android:layout_width="match_parent"
android:layout_height="56dp"
android:background="?attr/colorPrimary"
app:layout_scrollFlags="scroll|enterAlwaysCollapsed"
app:popupTheme="@style/AppTheme.PopupOverlay" />
</android.support.design.widget.AppBarLayout>
<android.support.v7.widget.RecyclerView xmlns:android="http://schemas.android.com/apk/res/android"
xmlns:app="http://schemas.android.com/apk/res-auto"
android:id="@+id/list"
android:layout_width="match_parent"
android:layout_height="match_parent"
app:layout_behavior="@string/appbar_scrolling_view_behavior">
</android.support.v7.widget.RecyclerView>
<include layout="@layout/btns" />
</android.support.design.widget.CoordinatorLayout>
这样就完成了上图的效果。
###position
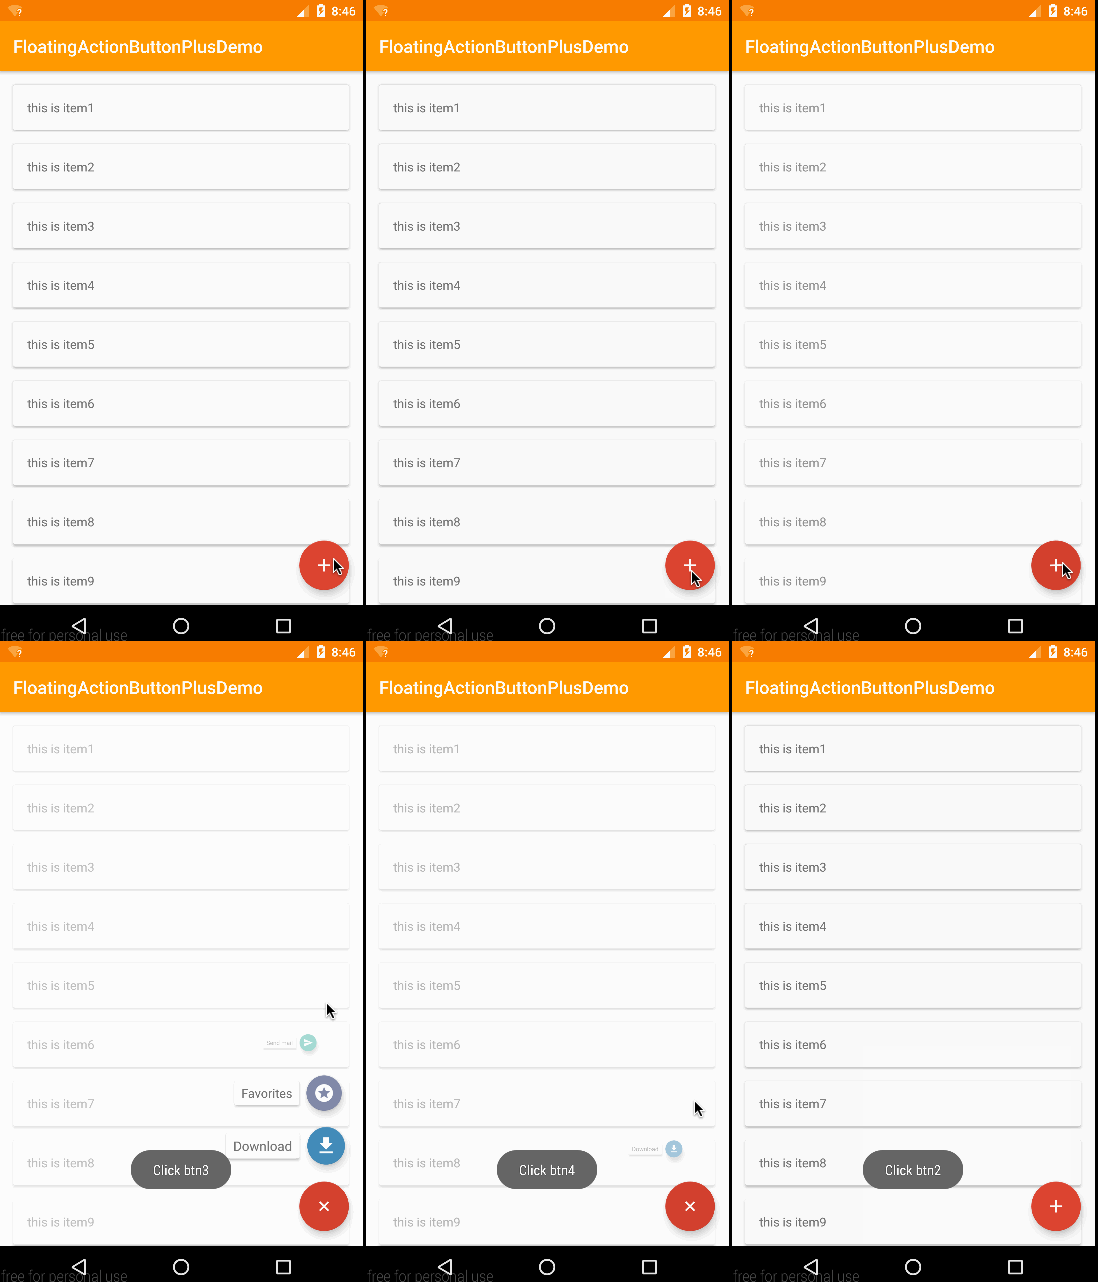
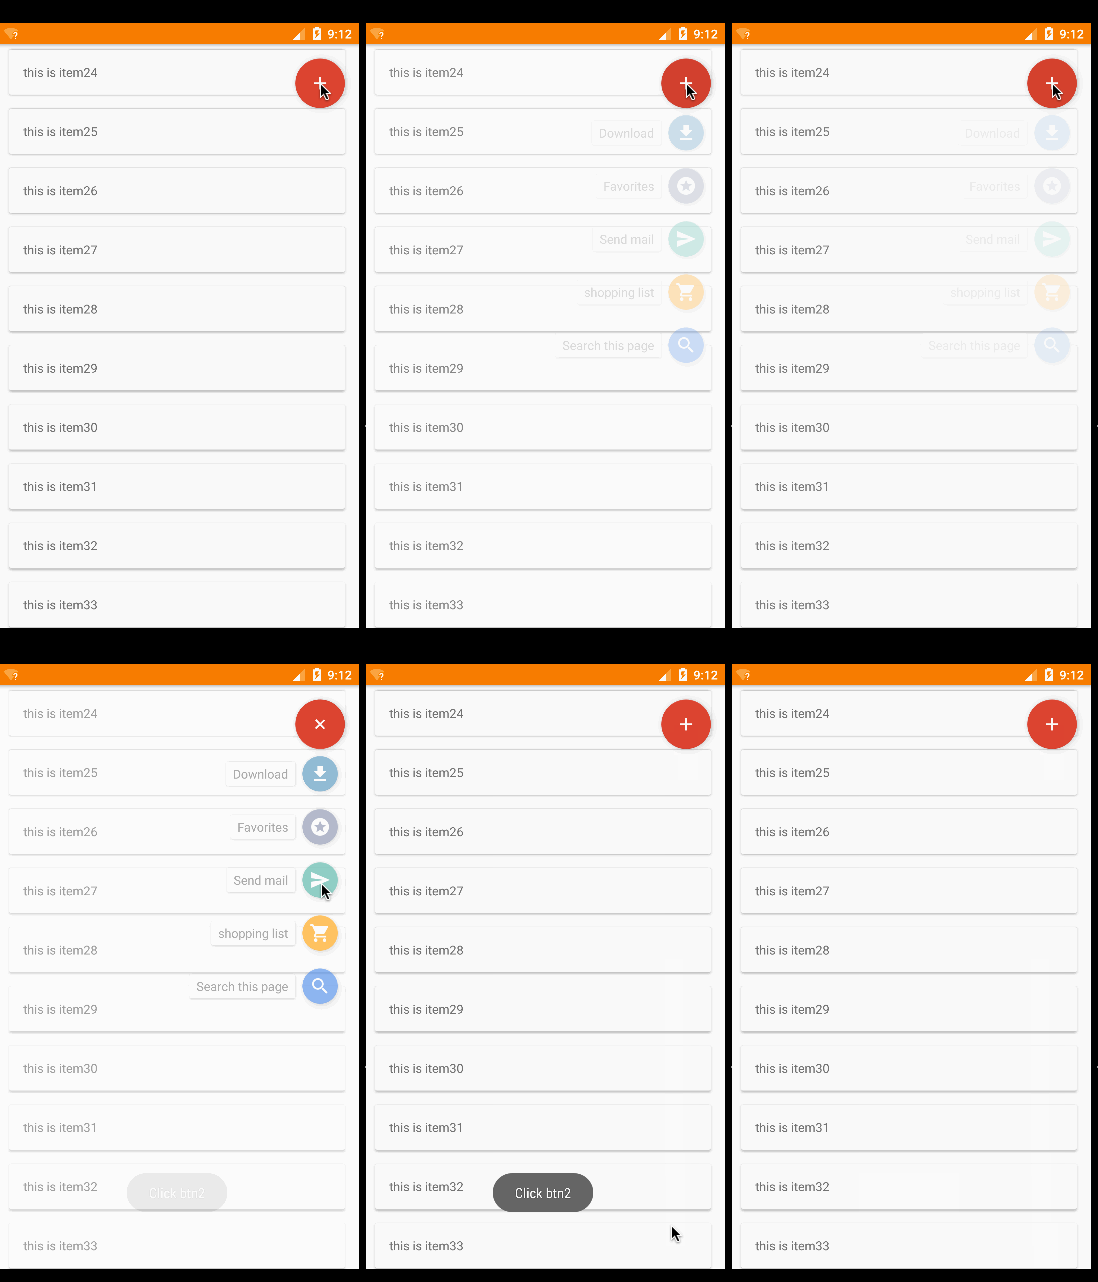
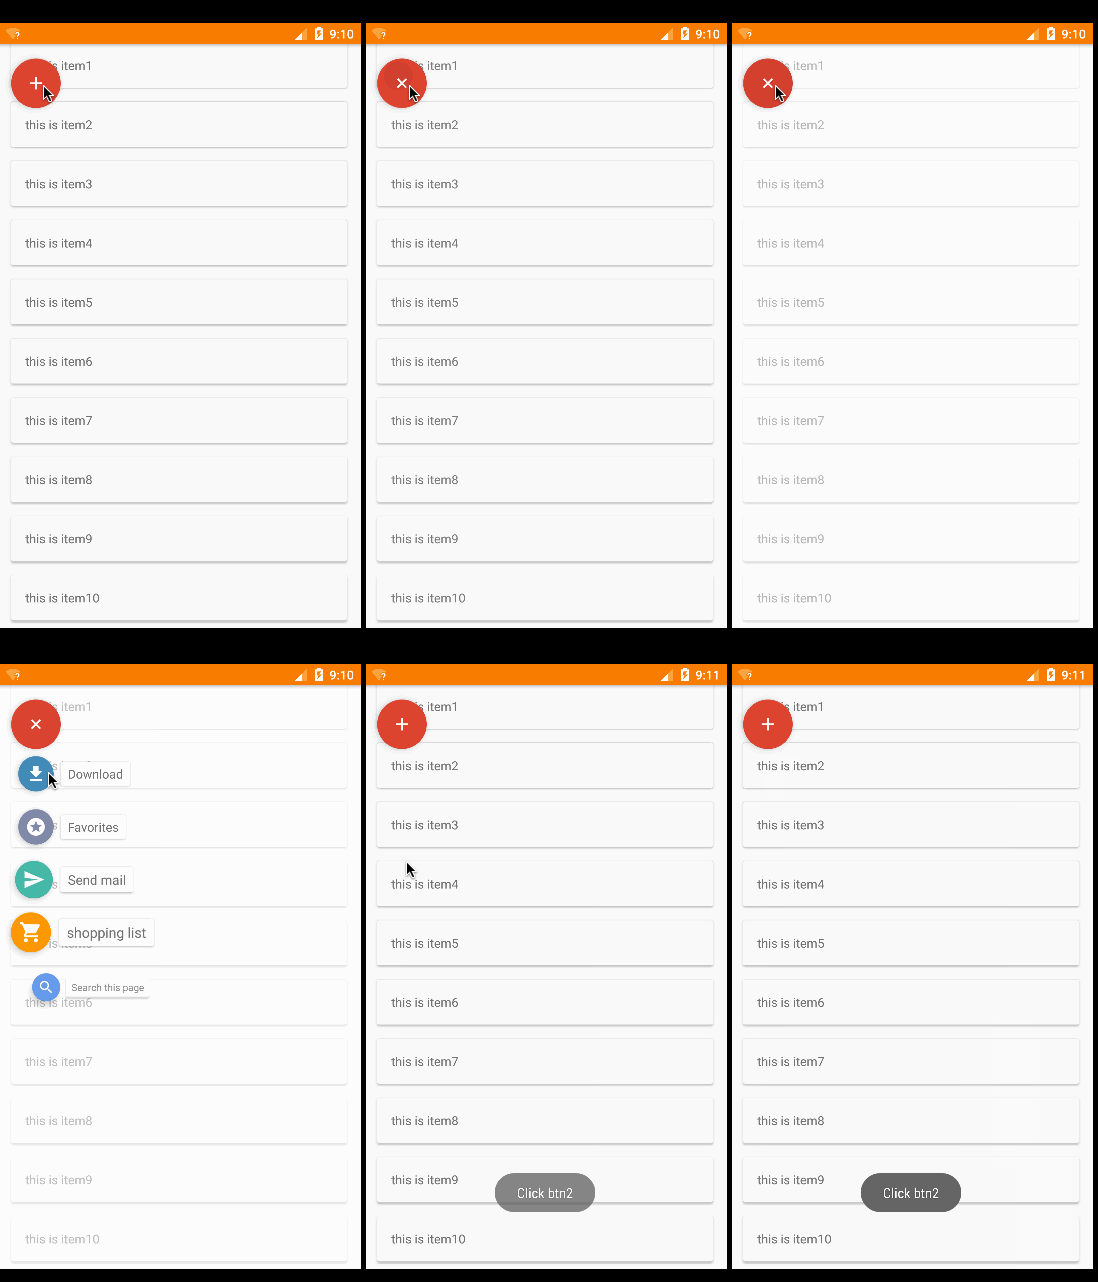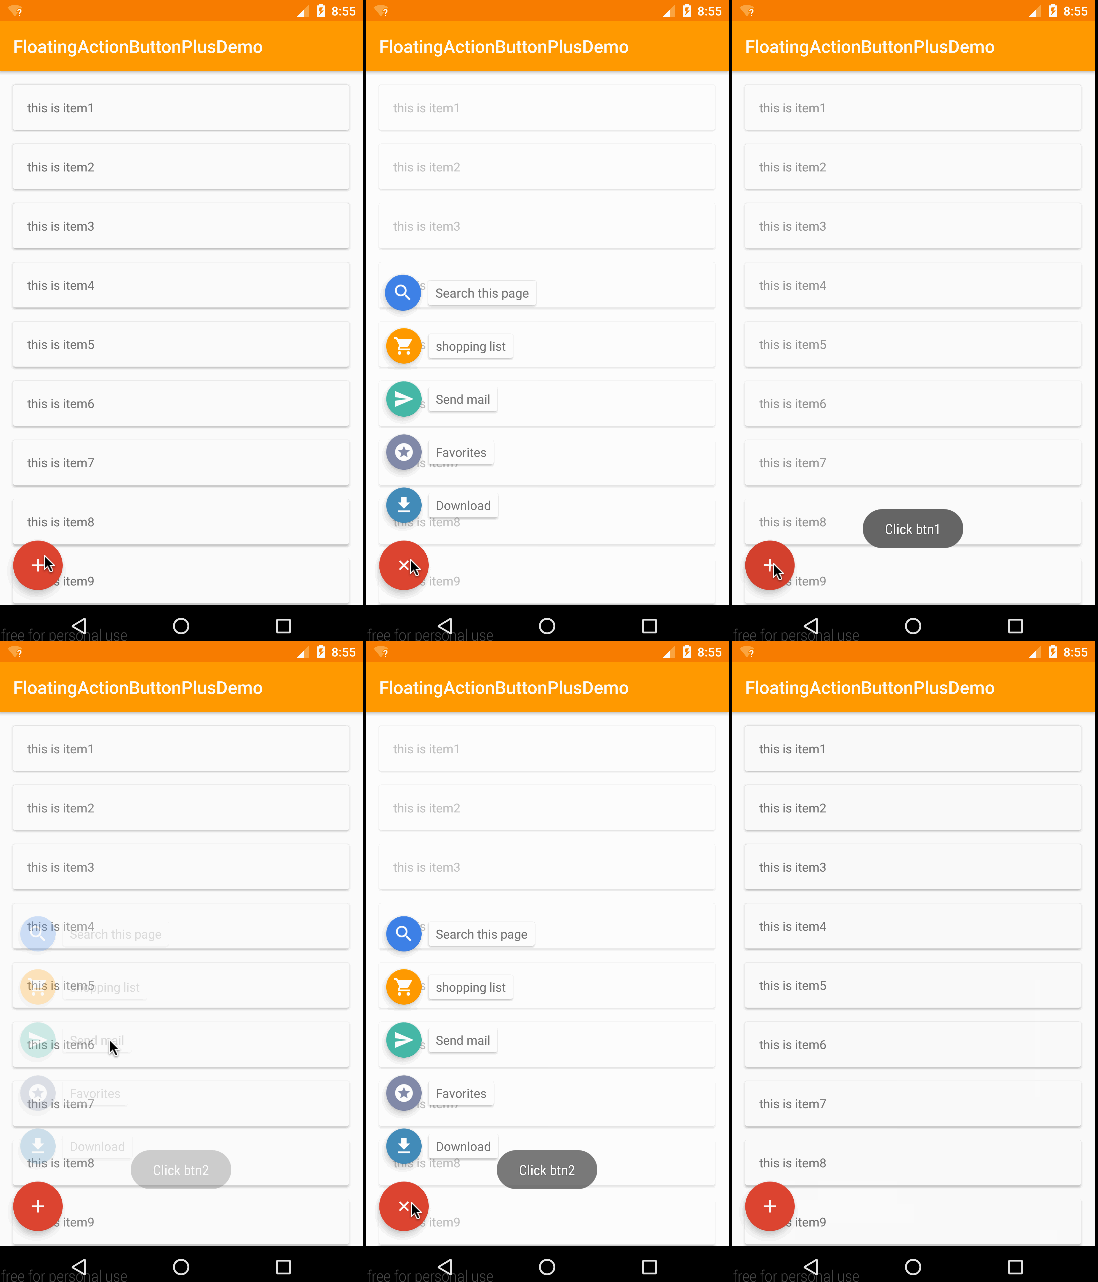
GIF会掉帧,实际效果很流畅
如图提供了四种position方式,默认为**right_bottom**。其他为**right_top**、**left_bottom**、**left_top**。在CoordinatorLayout中建议不要定位到top,会被toolbar挡住。
**position**可在XML布局中设置,也可在JAVA代码中设置。
####XML
在com.lzp.floatingactionbuttonplus.FloatingActionButtonPlus中添加
app:position="left_top"
value还可以是**right_bottom**、**left_bottom**、**left_top**
####Java Code
首先有四个常量分别为
public static final int POS_LEFT_TOP = 0;
public static final int POS_LEFT_BOTTOM = 1;
public static final int POS_RIGHT_TOP = 2;
public static final int POS_RIGHT_BOTTOM = 3;
通过FloatingActionButtonPlus对象设置
mActionButtonPlus = (FloatingActionButtonPlus) findViewById(R.id.FabPlus);
mActionButtonPlus.setPosition(FloatingActionButtonPlus.POS_LEFT_TOP);
###Animation
Animation暂时给了三种,分别为**fade、scale、bounce**,默认为scale。后续会可能会提供接口供使用者扩展。Animation同样可以在XML中或Java中设置。
####XML
在com.lzp.floatingactionbuttonplus.FloatingActionButtonPlus中添加 **fade、scale、bounce**三个值中的一个。如:
app:animationMode = "scale"
另可设置动画持续时间,单位为毫秒,默认为150毫秒
app:animationDuration = "300"
####Java code
首先有四个常量分别为
public static final int ANIM_FADE = 0;
public static final int ANIM_SCALE = 1;
public static final int ANIM_BOUNCE = 2;
通过FloatingActionButtonPlus对象设置
mActionButtonPlus.setPosition(FloatingActionButtonPlus.POS_LEFT_TOP);
mActionButtonPlus.setAnimation(FloatingActionButtonPlus.ANIM_SCALE);
动画持续时间可通过
mActionButtonPlus.setAnimationDuration(300);
###Events
暂时只给出了item的点击事件,如果有更多类型事件的需求,欢迎Email联系我。
mActionButtonPlus.setOnItemClickListener(new FloatingActionButtonPlus.OnItemClickListener() {
@Override
public void onItemClick(FabTagLayout tagView, int position) {
Toast.makeText(MainActivity.this, "Click btn" + position, Toast.LENGTH_SHORT).show();
}
});
###Scroll show or hide
关于滑动显示隐藏,这里有两种方法,
#####1、使用CoordinatorLayout
使用CoordinatorLayout的话,首先要确保你的外层layout是`android.support.design.widget.CoordinatorLayout`,如我上面activity_main.xml中的实例代码。之后你需要在`com.lzp.floatingactionbuttonplus.FloatingActionButtonPlus`中添加上`app:layout_behavior="com.lzp.floatingactionbuttonplus.FabBehavior"`,如下
<com.lzp.floatingactionbuttonplus.FloatingActionButtonPlus
android:id="@+id/FabPlus"
android:layout_width="wrap_content"
android:layout_height="wrap_content"
app:switchFabColor="#DB4537"
app:switchFabIcon="@mipmap/ic_add_white_48dp"
app:layout_behavior="com.lzp.floatingactionbuttonplus.FabBehavior"
xmlns:android="http://schemas.android.com/apk/res/android"
xmlns:app="http://schemas.android.com/apk/res-auto">
</com.lzp.floatingactionbuttonplus.FloatingActionButtonPlus>
#####2、监听滑动距离(judge scorll distance)
在没有使用CoordinatorLayout的情况下,我给出了两个public method。 分别为showFab() 和 hideFab()。通过FloatingActionButtonPlus对象去调用。所以你如果想要实现通过这个效果,需要你去获取当前Scroll的距离。例如在RecyclerView中你可以这么写:
mRecyclerView.addOnScrollListener(new RecyclerView.OnScrollListener() {
@Override
public void onScrolled(RecyclerView recyclerView, int dx, int dy) {
super.onScrolled(recyclerView, dx, dy);
if (recyclerView.getScrollState() == RecyclerView.SCROLL_STATE_DRAGGING) {
if (dy > 0) {
mActionButtonPlus.hideFab();
} else {
mActionButtonPlus.showFab();
}
}
}
});
###More settings
***
####XML
######com.lzp.floatingactionbuttonplus.FloatingActionButtonPlus
app:switchFabIcon="@mipmap/ic_add_white_48dp" <!--设置主Fab的icon图标-->
app:switchFabColor="#DB4537" <!--设置主Fab的颜色-->
app:mBackgroundColor="#99ffffff" <!--设置item展开后的背景颜色,默认为alpha99的白色-->
#####com.lzp.floatingactionbuttonplus.FabTagLayout
app:tagText="text" <!--设置item中lable中显示的文字-->
***
####Java Code
######com.lzp.floatingactionbuttonplus.FloatingActionButtonPlus
mActionButtonPlus.setContentIcon(getResources().getDrawable(R.mipmap.ic_add_white_48dp)); //设置主Fab的icon图标
mActionButtonPlus.setRotateValues(45); //设置主Fab被点击时旋转的度数,默认为45度
boolean state = mActionButtonPlus.getSwitchFabDisplayState(); //获取当前Fab的显示状态,显示时返回true,隐藏返回false
#####com.lzp.floatingactionbuttonplus.FabTagLayout
tagView.setTagText("text"); //设置label中显示的文字
##Other
#####关于为什么不直接在FabTagLayout里集成FloatingActionButton
主要是因为Google并没有给出用java代码设置FloatingActionButton的size的方法,所以没办法设置成mini型。我试过用反射去更改FloatingActionButton中的mSize这个private变量,在api21之后,可行,但21以下就会出现很多问题,例如icon不会跟着变小,阴影会变成矩形。这是因为在FloatingActionButton中是根据mSize的值去绘制阴影和决定icon大小的。而这一切操作都是在它的constructor中完成,所以我选择了让使用者来指定每一个FloatingActionButton。 当然日后也许我会试着制作一个独立的FloatingActionButton来解决这个问题。
#####About bugs
如果出现Bug,或者你有什么建议或需求,可以Email连系我。
#####E-Mail
**tracy550609334@gmail.com or 550609334@qq.com**
##License
Copyright 2015 liu zi peng
Licensed under the Apache License, Version 2.0 (the "License");
you may not use this file except in compliance with the License.
You may obtain a copy of the License at
http://www.apache.org/licenses/LICENSE-2.0
Unless required by applicable law or agreed to in writing, software
distributed under the License is distributed on an "AS IS" BASIS,
WITHOUT WARRANTIES OR CONDITIONS OF ANY KIND, either express or implied.
See the License for the specific language governing permissions and
limitations under the License.